")

Easy to follow step be step guide on how to vacuum down and recharge an automotive air conditioner, this guide is meant for repairs where the system has been opened for repairs ie: new condenser, compressor etc., but it also can be used as a maintenance procedure as well, though appearances may vary, this process is the same on most vehicles.
Each system has a specific amount of refrigerant needed to operate correctly and is located in the owners manual or on the a/c system itself, this guide will successfully recharge the system even if this information is not available.
Air conditioner systems deal with refrigerant under high pressure so use caution, read completely before beginning.
Difficulty Level - 4 of 10
Tools and Supplies Needed
- Air conditioner recharge gauge set
- 134a refrigerant
- Vacuum Pump
- Protective eyewear and gloves
Before beginning, park the vehicle on a level surface with the engine OFF, apply the emergency brake with the transmission in park, wear protective eyewear and gloves.
Refrigerant Recovery
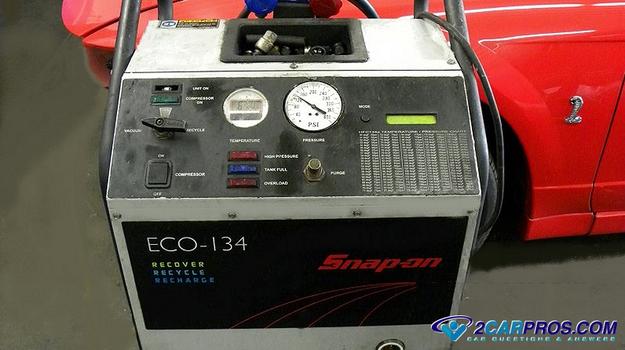
Step 1 - A charged system contains refrigerant under high pressure (70 to 100 psi static - system not running), this liquid/gas can be recovered. (Note: Allowing the refrigerant 134a to leak into the atmosphere is illegal, though is less harmful than its predecessor r12, which was slowly bled out of the system by loosening a hose fitting at the gauge set.) This recycling machine gathers refrigerant along with a small amount of compressor oil which is then separated into individual tanks.
Step 2 - Connect an air conditioner gauge set to the recovering machine and open the low side valve to start the recovery.

Vacuum Down and Recharge
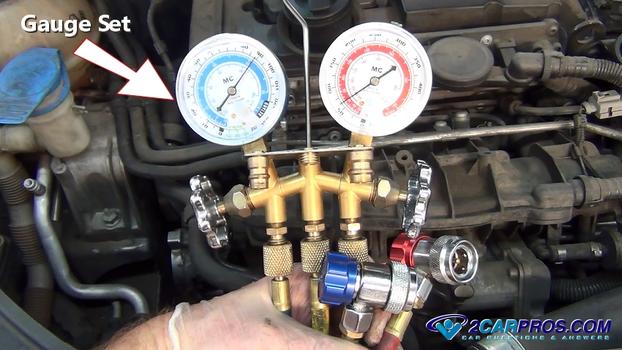
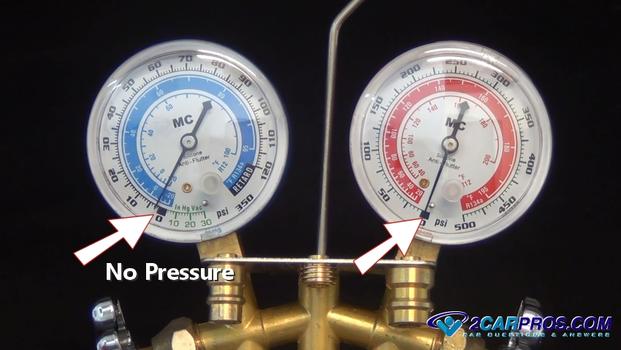
Step 1 - An air conditioner gauge set or recharge kit is needed to connect to the system on both high and low side pressure ports, a gauge set will also be used to vacuum down and recharge the system, inspect all hoses and connections. These units must be "air tight" and not have any leaks at hose fittings or valves. The red colored gauge and connector valve represents the high pressure side of the system, while the blue color represents the low pressure side. The center hose (yellow) is connected to a recovery machine or a new refrigerant supply bottle, both gauge valves should be closed.
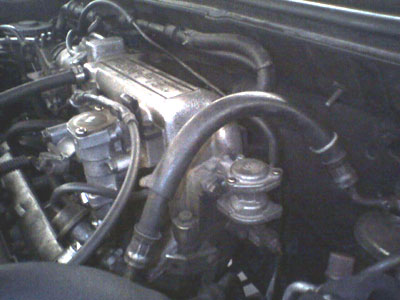
Step 2 - Beginning with system pressure at zero, by the way of recovery, repair or leak, start by locating both high and low side service ports, these locations will vary and can be obscure. (Note: a high pressure port is always larger than the low side port.)

Step 3 - Once located, remove both high and low side dust caps.

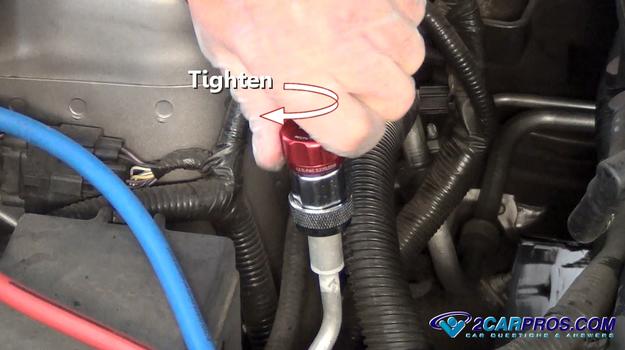
Step 4 - While pulling the retainer ring backwards, press the valve over the service port, repeat this for both service ports. (Note: High and low side fittings will only work on their respective ports.)

Step 5 - Once secured, tighten the valve which activates the internal plunger that opens the service port valve to the refrigerant lines.
Step 6 - With both gauge valves closed, there should be little to no pressure in the system.
Step 7 - Connect the center hose (yellow) to the vacuum pump or recovery machine and turn "ON", this step is used to remove any moisture and static air from inside the system.

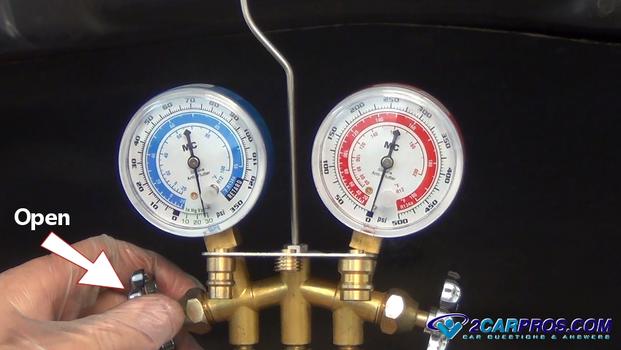
Step 8 - Slowly open the low side gauge valve, the pump will now start pulling vacuum throughout the system.
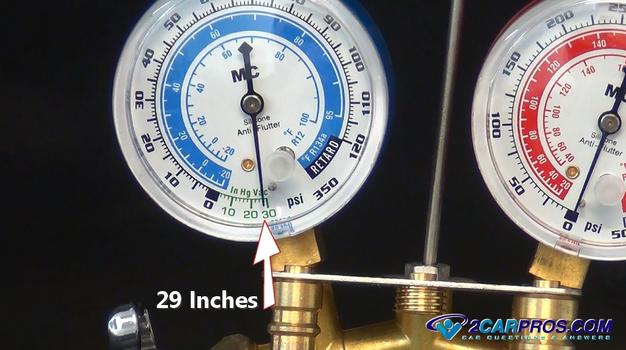
Step 9 - Once the vacuum has been on for 25 to 30 minutes, close the low side valve, the system should hold at 29 in., turn the vacuum pump or recovery machine "OFF" (Note: If the system loses vacuum there is a leak and must be rechecked. This could be a faulty O ring installation or a loose hose on the valve set). If the system hold vacuum proceed to the next step.
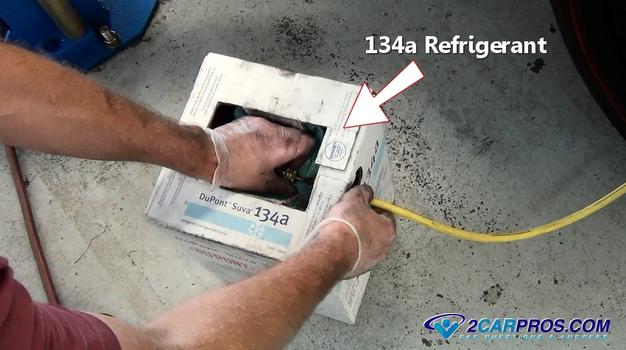
Step 10 - Disconnect the yellow hose from the vacuum pump and attach it to a new 134a refrigerant source. (Note: Many recovery machines have a charge feature that can be used.)
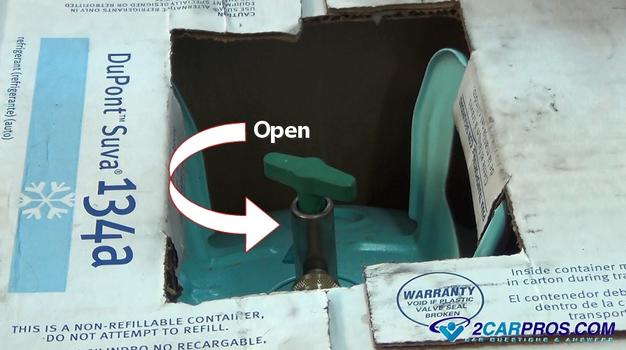
Step 11 - Open the valve on the Keg.
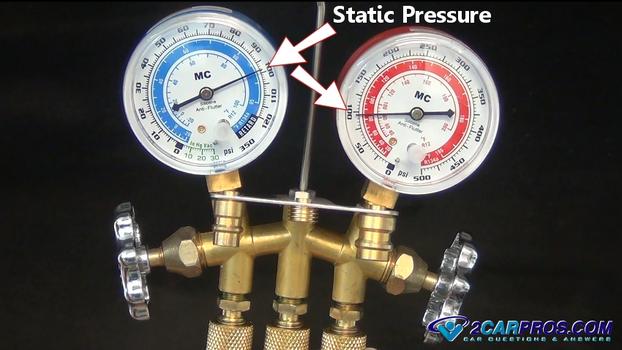
Step 12 - While the gauge valves are closed and once the refrigerant source has been opened, the gauges will respond with equal reading on both high and low side, this is static pressure which will vary depending on outside temperature.
Step 13 - Turn the keg over which expels liquid refrigerant instead of gas, this will help expedite system charge time, most systems hold about 2 pounds, a digital bathroom scale under the keg can aid in the recharge process.

Step 14 - Next, start the engine and turn the air conditioner "ON" to the highest settings including fan speed.

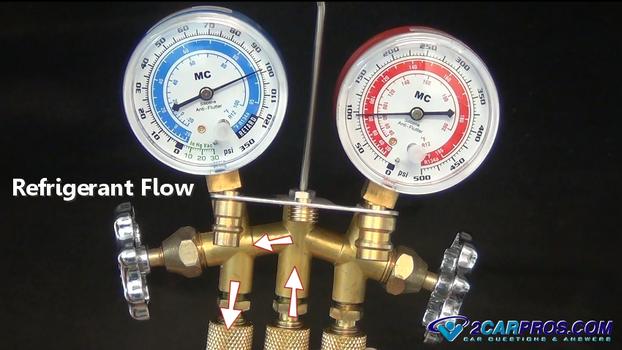
Step 15 - Slowly open the low side (blue) valve (never open the valve completely.) Refrigerant will start to flow to the low pressure port.(CAUTION: Never open the high side (red) valve, this will fill refrigerant container with high pressure and may cause a rupture.)
Step 16 - The compressor operation will begin which will be followed by the low side pressure dropping, while the high side pressure starts to rise.
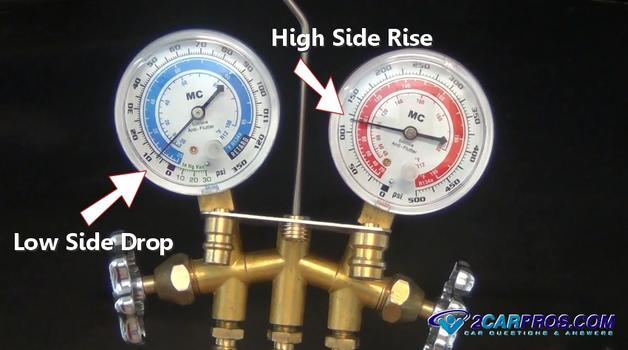
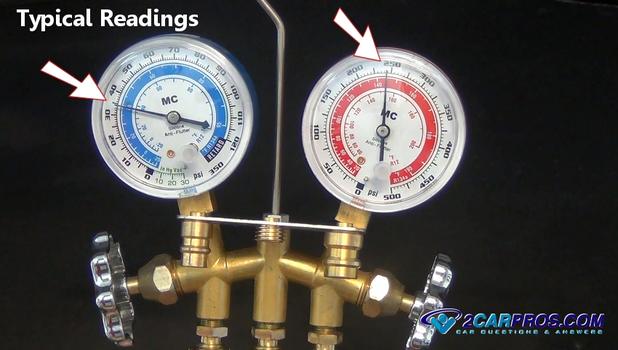
Step 17 - Continue adding 134a until the gauges start to look like this. If both gauges are too high the system is over charged or the cooling fan is not working. If high side pressure runs way up quickly, (300+) and the low side goes into a vacuum, the system has blockage; such as a plugged expansion or orifice tube. If the compressor engages, and neither gauge pressures move (stay the same) the compressor has failed. - Replace air conditioner compressor
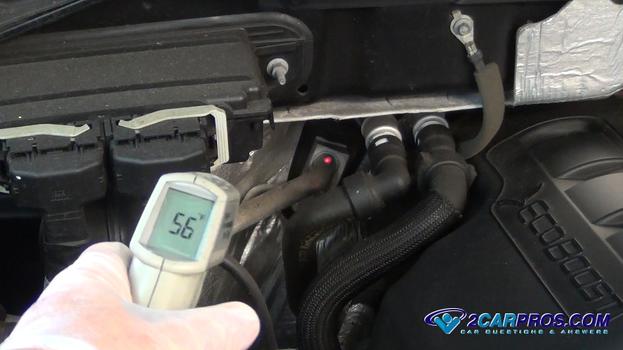
Step 18 - As these pressures rise monitor the temperature of outgoing line of the evaporator and air vents in the passenger compartment, both should be cold to the touch. (Note: Monitor the refrigerant scale weight to help determine a complete charge.)
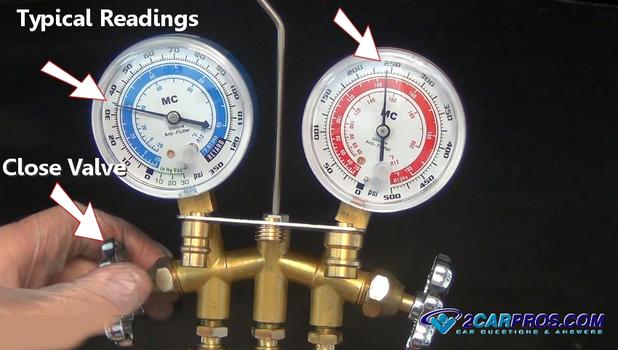
Step 19 - Once the system is performing properly close the low side gauge valve (Note: Do not overcharge).
Step 20 - Turn the ignition switch off, the A/C system will shut down along with the engine.

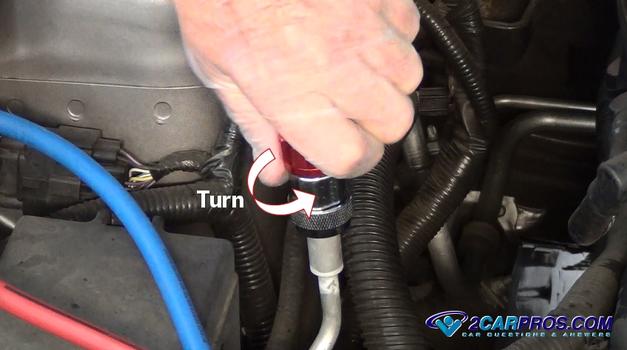
Step 20 - With the engine off, turn the connector counterclockwise to release the plunger effectively closing the service port, repeat this procedure for both valves.
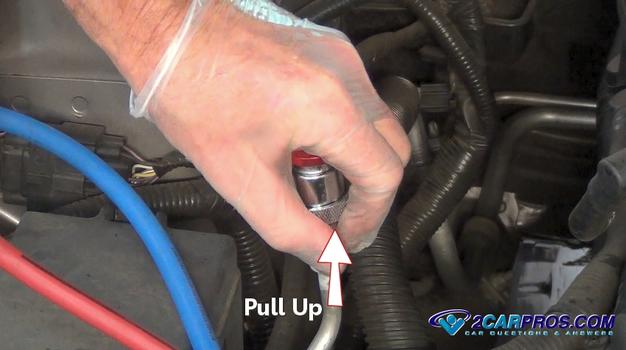
Step 21 - Firmly grasp the valve retainer and pull up, this will release the connector from the service port, repeat this procedure for both valves.
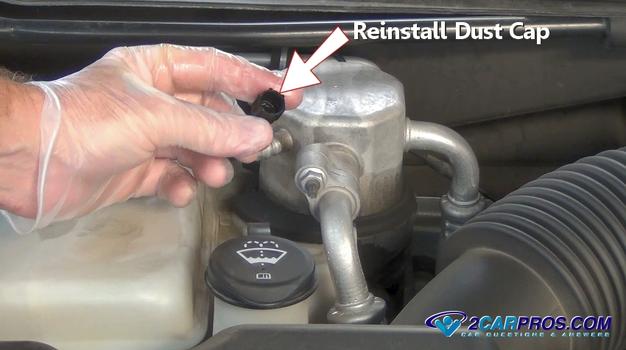
Step 22 - Once both valves have been removed, reinstall the dust cap for each service port. Once the job is complete, close the refrigerant supply valve and store the gauge set properly for the next repair.Enjoy the cold air!
Helpful Information
Automotive air conditioner systems have a mixture of refrigerant and oil to keep the air conditioning compressor lubricated during operation. Measuring the amount of (pag) oil is difficult in the system because it's spread throughout the system, in other words if there is a major leak and oil is dripping out, the system will need oil, unlike a very small leak which releases little to no oil. Oil can also be drawn out from the system during the evacuation process, if this occurs add new oil in its place, never re-install used oil.
There are two separate occasions in which an air conditioner system needs to be recharged, a normal condition of residual seepage, or when a repair has been performed such as replacing a leaky compressor, condenser or evaporator. Once the system has been opened it must be held under vacuum for a period of time (usually 30 minutes) to remove moisture.
The AC system will not work correctly if the engine is overheating or running hot.
If further assistance is needed, our certified car repair technicians are ready to answer your car repair questions for free.
Common Problems
- Failed compressor
- Refrigerant leak
- Plugged orifice tube/expansion valve
- Failed vent control system
- Shorted control switch or relay
- Plugged condenser or evaporator (cooling fins)
Best Practices
- Use a garden hose or compressed air to clean the condenser at the front of the vehicle to ensure maximum system performance.
Reference: https://www.2carpros.com/articles/re-charge-an-air-conditioner-system
| A/C Diagnosis Chart | |||
| Low side | High Side | Duct temp | Possible Cause |
| Low | Low | Warm | Low refrigerant charge |
| High | High | Warm | Over charge of Refrigerant |
| High | High | Some cool | Air in system or Overcharge |
| Normal | Normal | Warm | Moisture in the system |
| Low | Low | Warm | Expansion valve stuck closed |
| Low | Low | Warm | Orifice tube plugged |
| Low | Low | Warm | High side restriction |
| High | Low | Warm | Compressor or control valve failed |
| Source:http://www.aa1car.com/ | |||
A/C Gauge Readings:
To determine the HIGH SIDE and LOW SIDE pressures inside your vehicle's air conditioning system, you need an A/C Gauge Set. The Gauge Set must be connected to the A/C service ports on vehicle to read the pressures while the system is running.
With the engine OFF, connect the A/C Gauge Set High Pressure Hose (the one with the larger coupler fitting) to the High Side service port (usually located in the compressor output line that goes from the compressor to the condenser). Connect the Low Pressure Hose (the one with the smaller coupling) to the Low Side Service port (usually located on the accumulator, or on the suction hose that goes from the evaporator to the compressor).
Start the engine, turn on the A/C to MAX, and rev the engine to 2000 RPM. Hold the engine speed and note the High and Low side pressure gauge readings.
NOTE: High and Low side pressure readings will vary with ambient temperature and humidity. The higher the temperature and/or humidity, the higher the gauge readings.
With late model R134a systems, good high pressure readings should range from 150 to 220 PSI at 80 degrees F, 170 to 250 PSI at 90 degrees F, and 195 to 280 PSI at 100 degrees F.
A High side pressure reading of less than 150 PSI indicates a low charge or a compressor problem. A high pressure reading over 300 PSI would indicate an overcharge condition (too much refrigerant in system) or a restriction in the high side.
Good low pressure readings with R134a should usually be in the 30 to 35 PSI range. If higher, there may be a low side restriction. If the reading is lower, the system may be low on refrigerant.
With older R12 A/C systems (1994 model year vehicles an older that have NOT been retrofitted to R134a), the HIGH side pressure readings will typically be 150 to 185 PSI at 80 degrees F, 175 to 205 PSI at 90 degrees F, and 200 to 250 PSI at 100 degrees F. Normal LOW side readings with R12 should be around 20 to 30 PSI for an expansion valve system, or 15 to 40 PSI for an orifice tube system.